When I had my son, there were several Mommy and Me yoga classes around for new moms and infants. But, as he got older - it became impossible to find a yoga class for 3 year olds. Until, one day, I happened upon Next Generation Yoga and its owner/founder, Jodi Komitor. Founded in 1998, Jodi, a pioneer in the kids’ yoga movement, created the first yoga studio (in the world) just for kids! Jodi's take on yoga for kids: "The mission of Next Generation Yoga: joyful, playful self-expression for children." Her classes are incredible! She has family classes, which are a wonderful bonding experience to do with your kids. She sometimes even does classes on the beach. After my boy's first class, he said, in the car ride home, "I felt such peace while I was there." He was 3! So, if you are in the San Diego area, I would consider this a MUST!
Wednesday, June 30, 2010
Tuesday, June 29, 2010
CURIOSITY
Saturday, June 26, 2010
SO, YOUR KIDS ARE OUT OF SCHOOL - NOW, WHAT?
Thursday, June 24, 2010
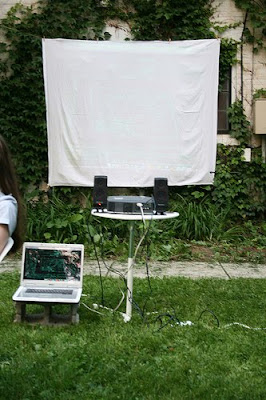
SUMMERTIME MOVIES
Wednesday, June 23, 2010
The Green Parent - Great Magazine!
24 MAY 2010
Make recycled boats
In this project from the latest edition of The Green Parent you can learn how to make these great boats that are fun for all ages and encourage resourcefulness. Boats can be made out of anything that floats, from a simple piece of bark or twigs, to bits and pieces from the recycling bin.
*SUPPLIES *
For wooden rafts and boats: small straight branches or twigs, raffia (or string or twine), fabric scraps, needle and thread
For recycled boats: juice or milk carton washing up bottle (any item that floats) discarded paper, twigs, modeling clay
1 The simplest wooden vessel to make is a raft; add a sail and it not only looks more like a boat but the sail will push it across the water. Collect an assortment of small, fallen branches and twigs and look out for straighter wood. Decide how large you want your boat to be, trim the branches to that length and line them up to check the overall size. When you have the size you like, take a long piece of raffia and tie the centre of the length of raffia around the end of one of the trimmed branches. Note: Do not pull the raffia too tight or it might break, it’s okay if the branches are a little loose. Take the ends of the raffia and tie another branch the same way around the end right next to the other one. Keep adding branches and tying them until you’ve tied all of the branches together. Then tie the opposite ends of the branches together with raffia in the same way.
2 Make the boat more stable by tying a support branch across each end of the branches where you tied the raffia. Secure these branches by tying one end with raffia, then thread the raffia around the top branch and down around the lower branches. Continue threading until you reach the end and tie it off. Repeat on the other side of the raft. Make a sail for your boat by cutting a scrap of cloth into a triangle with a 90-degree angle. You may want to cut the triangle out of a piece of paper first and hold it up to the boat to determine the size sail you want; then use the paper sail for a pattern to cut out the cloth. At this stage >
> you may want to decorate the sailcloth with embroidery or patches.
3 Lay a straight twig over the cloth edge opposite the 90-degree angle and fold the cloth over the twig. Using a needle and thread, stitch the twig to the cloth. Add a twig to the bottom of the sail to create a “boom” and attach it with a needle and thread in a few places. Next take a long twig for a mast. Measure it against the boat to determine the height you’d like it to be and add about 5cm to its base (extra length is needed when you attach the sail to the boat). Stitch the remaining edge of the sail to the mast in a few places and leave a little room at the top for a flag. Stitch a small flag to the top of the mast if you wish. Wedge the sail between two of the twigs of the boat. If the mast is loose, tighten it at the base by tieing raffia tightly around the mast base and the twigs of the boat or wedge in a little modelling clay to tighten it. Set it to sail on a pond, stream, a bowl or the bath.
4 Make boats from recycled materials.
Position a juice carton flat on its side so the triangular part of its top points up and cut off one side. The triangle will form the bow of the boat. Take a piece of paper and cut out two pirate ship style sails, one slightly smaller than the other.
5 Trim a stick to the right length to form a mast and thread the sails on to the twig, the largest first. A flag can be attached to the top of the mast.
6 Roll a ball of modelling clay in your hands and centre it in the bottom of the carton and stick it down; then push the mast into the ball of clay.
Note: Boat making is a great summertime activity for a group of children, just provide a pile of parts and see what they build. After the building, hold a regatta. In addition to the boats, small sailors and pirates can be made using materials that float, like clothes pegs or empty thread spools with wooden beads for heads.
Download a template for the sails here
Joan Gorman is a full-time mum, part-time art teacher and contributes the fantastic crafts pages inside every edition of The Green Parent magazine. Visit her lovely blog for inspiration.
Friday, June 18, 2010
WORKING MAMA
So, I don't have a "conventional" career. But, these days, what is "conventional?" I am a working actor, director, and teacher. It can be a crazy life, in some ways...auditions popping up at the last minute, late nights at the theatre...but it's my life. And, I am so glad to be able to share what I do with my little boy.
Sunday, June 13, 2010
Classics For Kids
Friday, June 11, 2010
ORGANIC GARDENING - TIP OF THE WEEK!
Thursday, June 10, 2010
FUNNY STUFF!
Wednesday, June 9, 2010
GROWING UP IN THE JUNGLE
Sunday, June 6, 2010
SUMMER IS....
Saturday, June 5, 2010
PERFECT DAY
Perfect days just happen. You can't make them happen. Take, for instance, Mother's Day this year. My son was playing at his grandmother's that morning and the last thing he wanted to do was be torn away from his playtime there to spend time with mommy. I was devastated! "It's Mother's Day, d*** it!" I thought, "How could you not WANT to spend time with your loving mother!!!" Anyway, he finally acquiesced. We went ocean kayaking (one of my favorite things). The weather was a bit gloomy - but it didn't look too choppy out there - that is, until we hit the water. I swear, it was like the perfect storm. For those of you who haven't been ocean kayaking, you have to take your kayak directly out. If there is a wave cresting towards you, you HAVE to paddle hard - right into it - and hope you ride over the top of it. "Oh my god," I thought "What was I thinking!?!" My son was at the front of the kayak, the perfect view for the 6 foot swells that appeared out of nowhere. Well, needless to say, we made it! But, that day was not the perfect day I had hope for.
Friday, June 4, 2010
COLOR WHEEL PROJECT
Thursday, June 3, 2010
Hydroponics
THE FARM WAS FULL OF ROW AFTER ROW OF GROWING TABLES WITH PERFECT PLANTS THRIVING IN EACH GROW SITE. COCOA MULCH OR VOLCANIC ROCK IS THE GROWING MEDIUM. NO SOIL IS EVER USED. THEREFORE, HARMFUL INSECTS ARE NOT INTERESTED IN THE PLANTS. MICRO-TUBING LEADS INTO EACH BUCKET. IT CONSTANTLY FEEDS THE PLANTS “ONE DROP AT A TIME” WATER AND ORGANIC NUTRIENTS FROM THE RESERVOIR TANK. THE TANK RECYCLES THE WATER AND ORGANIC NUTRIENTS CONSTANTLY. EVERY 2 WEEKS, THE WATER IS CHANGED AND NEW NUTRIENTS ARE ADDED. FOR A EVERY 75 GALLONS OF WATER THAT A TRADITIONAL “IN- GROUND” GARDEN USES, THE HYDROPONIC GARDEN USES ONLY 15 GALLONS OF WATER! SINCE THESE PLANTS DO NOT HAVE TO BATTLE PESTS, DISEASE, AND ROT - THEY GROW VERY VERY FAST AND PRODUCE VERY VERY HIGH YIELDS. FOR INSTANCE, A PEPPER PLANT GROWN IN SOIL MAY PRODUCE 20 PEPPERS. IN A HYDRO POT, IT WILL PRODUCE 4 TIMES THAT MUCH! KAREN, CO-OWNER OF ARCHIE'S ACRES SAYS, "AT THAT POINT, YOU ARE MAKING PEPPER JELLY!"
So, we hope to garner lots of support at my son's future school for this project. The growing tables will be kid-height, so it will be easy to reach. Also, an added bonus is that people who are in wheelchairs could easily access this type of garden. That is a beautiful thing!